Showing posts with label Recipe. Show all posts

Wednesday, 17 December 2014

VINTAGE: 1970's Apple-Carrot-Raisin Cake

Apple Carrot Raisin Cake

If you have a sweet tooth then this apple-carrot-raisin cake with a load of cinnamon thrown in for good measure is one for you. It's another of my dug out and re-found vintage recipes - one found among a group of Detroit Free Press newspaper recipe clippings. While this is one undated, the rest all dated from the 1970's so I'm throwing caution to the wind and dating this to the same age.

As in it's description it's very much a pudding cake, it's moist and sweet and with the nutmeg and cinnamon has a festive feel for this time of year. While it only calls for 1/4 of a cup of butter (or marg) the apples and the carrots keep it amazingly moist even though it looks like sawdust before you place it into the oven.
It's one of those awesome bakes that doesn't take too long to put together (bar all the cutting up) and you can happily got watch your favorite show while it bakes away. I love how crispy the sugary lemon juice glaze makes it and finishes it off perfectly.

So if you're all fed up of Christmas cake, and pudding and have some left over carrots, give this a go and let me know how it turns out!


Friday, 21 November 2014

FOOD: A Vintage Spice Cake

Cookbooks, especially vintage ones tend to be modest in selling their recipes. Recipe names are simple, straight forward and pretty much to the point. So it's rare for them to state "exceptionally good" within the directions, yet alone the title. As I love all things spice I would have tried this recipe, but an "exceptionally good" spice cake, well that got me baking it all the quicker. 

The recipe comes from an old Calumet Baking Powder booklet, one very well loved and used over the years before I came across it at an estate sale. It's so well loved that the first 13 pages are missing so while I can't precisely age it, it's very 1930's in style. I admit I have issues, I can't throws things like this out, they might be falling apart but if I can save them I will, if I can use them, even better.

Spice Cake Recipe

Vintage recipes can be a little tricky to work with - I mean even this one didn't give me a baking temperature or time but it worked out great. Plus my favorite with vintage recipes - they rarely call for any strange ingredients, sometimes one's that may be tricky to find, but not this one.

So this spice cake is prefect and seasonal what with the nutmeg and cinnamon. It's super moist, so moist you don't even need a frosting on the top. Perfect!

Spice Cake - Exceptionally Good

1/2 cup of butter
1 cup of sugar
2 cups of flour
2 level teaspoons of baking powder
1/2 teaspoon of nutmeg
1/2 teaspoon of cinnamon
Pinch of salt
3/4 of a cup of cold water
Yolks of four eggs or two whole ones

Cream the butter and sugar thoroughly and add in the eggs. Sift the flour with the baking powder, spices and salt. Alternate mixing in the water and the flour mix into the creamed butter. Bake in a square pan at 350F for 45 minutes until slightly golden.

Spice Cake Recipe

But was it an exceptionally good spice cake?

Well yes, yes it actually was.

Tuesday, 4 November 2014

FOOD: Playing With All the Spices

Spices

I love spices, I love buying them, I love the smell of them, I love cooking with them. They are one of my favorite things when it comes to food. They are fantastic at adding flavor into your meals but they also have some great health properties - take ginger known for it's role in aiding digestive uses, particularly nausea or turmeric considered for it's properties in protecting against cognitive decline. 

Most of the time I like to keep my supplies well stocked and tend to have around 25 herbs and spices at anyone time - why so many, well I make all my own home made curries (Indian and Thai) and I'm starting to experiment with more Mexican dishes, so having a stock of spices always comes in handy. Buying spices can be a little pricey to start with, but luckily they last and store well, plus you don't really need to have all of them.

If making your own homemade Indian curries spikes your interest, I'd suggest stocking up on at least the following;

Spices:
  • Coriander
  • Turmeric
  • Chili powder
  • Cumin
  • Cinnamon
  • Curry powder 
Fresh:
  • Herbs - especially cilantro, known as coriander in the UK
  • Ginger
  • Garlic
Extras:
  • Onion seeds
  • Mustard seeds
  • Garlic powder
  • Ginger powder
  • Nutmeg
  • Cardamon (if you can find it)

While I've been making my own curries for the last three years, I've never considered making my own spice blend. No excuse, no real reason why. So when I came across this article from Woman's Health on DIY Spice Blends I thought, well why the hell not. The article has a great collection of 9 spices designed to help loose weight - which is a great added benefit of spices. The one I'm sharing is a curry blend, which those the spices it uses will be excellent for an Indian curry.

Curry Blend  
2 tablespoons of cumin powder
2 tablespoons of ground coriander
2 tablespoons of turmeric
1 1/2 teaspoons of ground cardamon*
1/2 teaspoon of cinnamon
1/2 teaspoon of cayenne pepper

* Cardamon isn't always the easiest spice to find, but you can use a mix of cinnamon and nutmeg - equal parts of each to make an alternative. 

Spice blenders are basically some of the easiest recipes of literally just mixing all the ingredients together and away you go. If you like your curries a mild to medium spice, work with using about 1/2 a tablespoon of the blend.

What about you? Do you love your spices too?!

Monday, 20 October 2014

Food: Vintage Apple Pie Recipe

Apple Pies

It's more than possible that I blog about apple pies every autumn, but seriously they are one of my favorite things about the season especially when you pick them yourself like we did on our last trip to the orchard. But I also grew up with apple trees in the back garden so half the fun was being a tomboy and climbing them but also getting to help pick them every autumn, wrapping them up for over the winter and all the apple pies and crumbles we could eat.

Modern recipes for apple pies are far too fancy for my liking, they always to make such a song and dance out of a relatively easy recipe. So I always reach for a recipe that's in one of my favorite vintage cookbooks - The Boston School of Cooking Cookbook. It's a very well loved, a little tattered and worn but essential cookbook in my collection. It has both my go to recipe for plain pastry and for apple pies (which I love playing around and adjusting). 

Apple Pie Recipe

While this recipe is pretty simple, that doesn't mean it can't be jazzed up, I always through in a cup or two of raspberries into each pie and I'm sure brambles or raisins would taste just as good too. But this recipe is to much of my favorite to not share again (with some adjustments from the last time it was posted).

Old good fashioned apple pie

6 medium apples - eating or cooking
2 cups of raspberries
1/2 cup of brown sugar
1/4 teaspoon of cinnamon
1/4 teaspoon of all spice
1/4 teaspoon of salt
1/2 tablespoon of butter
2 tablespoons of lemon juice
Milk

Line bottom of your pie tin with pastry and cut off any excess pastry from around the edges. Peel, core and cute apples into small bite sized pieces and mix in the raspberries. Dump them both into your pastry lined pie tin. Separately mix the sugar, cinnamon, all spice salt and lemon juice together and sprinkle over your apple/raspberry mix. Cut up your tablespoon of butter and dot it around the top.

Wet the edges of your pie and roll out/take your pie top and lay over, covering the pie. Press the edges together. Cut a little vent in the top of the pie and glaze with a little bit of milk so the crust goes lovely and golden.

Bake at 450F on the lowest shelf for 10 minutes then reduce to 350F for 45 - 60 minutes on the middle shelf.

Going by how many apples we still have left, this recipe will be getting used for many more pies in the next month or so. It's that good and never lasts long around here.

But the big, all important question is, what do you serve your apple pie with? Custard, cream, ice cream?

Wednesday, 8 October 2014

FOOD: Raspberry Cake

Raspberry Cake

With a freezer full of raspberries, it was high time I took to doing something wit them and with the need to find a recipe for a birthday cake for myself, what better an opportunity to use some of them up. You'd think raspberry cakes recipes would be easy to find, but apparently such cakes are a modern invention. While I love using my vintage cookbooks, none had any such recipe, for once pinterest came to the rescue. 

The recipe I came across from Food Loverr which is actually adapted from one on food.com is pretty straight forward, and like most of the recipes I come to share here, there's no out of the ordinary ingredients required. I found the bake time was very underestimated and after baking with frozen raspberries, i'd suggest using fresh ones. The icing was also meant to be decorated with raspberries, but I misjudged and didn't have enough - oops. 

Raspberry Cake


Cake
1/3 cup of butter
1 cup of sugar
1 egg
3 teaspoons of baking powder
1/2 teaspoon of salt
2 cups of sifted all purpose flour
1/2 teaspoon of cinnamon
1 cup of milk
1 teaspoon of vanilla extract
2 cups of fresh raspberries 

Glaze
1 1/2 cups powdered/confectionery sugar
1 teaspoon of melted butter 
6 tablespoons of heavy cream

Mix the butter and sugar together, adding in the egg and mix well. Combine all the dry ingredients. Separately add the vanilla extract to the milk and add, alternating with the dry ingredients into the butter/sugar mixture and mix well, until smooth. Pour batter into a lined loaf pan and sprinkle raspberries over the batter. Place into a preheated oven at 375F for 45 minutes (original recipe states 30 - but the batter was far too wet). After the cake has baked, make the glaze by mixing all the ingredients - sugar, melted butter and cream and frost while still slightly warm.

Have you baked anything tasty lately?

Friday, 28 March 2014

FOOD: Mango Chicken Curry

Mango Chicken Curry

It's high time I shared my favorite curry recipe, the fact that we have a home made curry, made from scratch every Wednesday seems to pass by a lot on my blog. Admittedly I have selfish reasons of the page the recipe is on is very well worn out after getting stuck to another page, so this is for my own records as much is it is for sharing with you all.

It's a pretty straight forward curry recipe typically using the spices you should already have if curry making is your thing. It's sweet, mild and full of flavor. While it takes a bit in preparation, it's quick to cook and well worth the time. 

1 medium mango (go by your personal taste by how ripe you want it)
1 good sized chicken thigh or breast
1/4 teaspoon of onion seeds
1 teaspoon fresh ginger pulp
1/2 teaspoon of fresh garlic pulp
1 teaspoon of chilli powder
1/4 teaspoon of turmeric
1 teaspoon of ground coriander
2 tablespoons of oil (vegetable, corn or peanut - whatever you have) 
4 curry leaves (or a teaspoon of curry powder)
1 large onion
1 cup of water
2 medium tomatoes
2 medium green chilli's seeded and chopped
1 good sized teaspoon of dry cilantro (2 tablespoons if you have it fresh) also note coriander is often known as cilantro in the US

First things first, peel the mango and slice into blocks and divided into two. Take one of the piles and place into a bowl, adding in the chicken cubes, onion seeds, ginger, garlic, chilli powder, turmeric and ground coriander and mix well. 

Mango Chicken Curry Mango Chicken Curry

In your pan, heat the oil and pop in the sliced onions, once golden add in the curry leaves (which I never have to use about a teaspoon of curry powder instead). Gradually add in the chicken pieces and finish off with pouring in the water. Lower the heat and simmer for 12 to 15 minutes, string every now and again until the chicken is cooked and the water has been absorbed. 

Once the 15 minutes have passed, add in the remain half of the mango, the chopped up tomatoes, chillies and cilantro, give it a quick stir and heat through and then serve.
mango curry

This curry takes me to my happy place every time.

What are your favorite curries to make or eat?

Wednesday, 19 February 2014

FOOD: Rhubarb Cake

Rhubard Cake

Finally rhubarb season has rolled around again (yey!), so it's time to get stocked up and get baking. I can never turn down a good old fashioned rhubarb crumble with a huge dollop of custard. Sadly rhubarb has a bit of a bad reputation - many find it a little too sour to be enjoyable and others love it for that reason alone, plus it's a really good source of fibre and vitamins (score!). So to offer something a little different, I thought i'd start the rhubarb baking season with a cake, because everyone loves cake right?!

Like the banana cake recipe, this cake is taken from the 1990 Hometown Collection (I told you it was becoming a favorite) with this particular recipe credited from the Exclusively Rhubarb Cookbook - a charity cookbook from Coventry, Connecticut. Again it's a pretty straight forward recipe and doesn't call for anything you probably don't already have (bar the rhubarb). 

Rhubard Cake

So, to the recipe!

You'll need;
  • 1/2 cup of butter (softened)
  • 1 1/2 cups of white sugar
  • 1 egg
  • 2 cups of all purpose flour
  • 1 teaspoon of baking soda
  • 1/2 teaspoon of salt
  • 1 cup of milk
  • 3 cups of finely chopped rhubarb - this works out at being about 6 average sized stalks
  • Sugar and cinnamon for sprinkling 
Cream your butter and after a good mixing, add into your white sugar gradually, finishing off with adding in the egg and mixing well. Seperately add the flour, soda and salt. Alternating with the milk (I should probably add the recipe called for buttermilk but I never have that so go with whatever you have) add the dry mix into the mix. Finally add in the chopped up rhubarb. 

Pour the mix into a greased and lined 13 x 9 x 2" baking tray and sprinkle over the cinnamon and sugar - as much or as little as you'd like. Pop the tray into a preheated oven (350F) for 45 minutes or until a cake tester comes out clear.

Rhubard Cake

The result is a lovely moist, surprisingly sweet but with a delightful taste of rhubarb and the cinnamon with sugar topping leaves a crisp warm winter taste in your mouth. The rhubarb does keep the cake a little soggy even after being cooked so it won't last too long but it freezes perfectly so your batch can be happily divided up and saved. 

How do you like your rhubarb? Lover or a hater?

Thursday, 13 February 2014

VINTAGE: 1937 German Cookbook

Germancookbook Germancookbook Germancookbook Germancookbook

One of the perks of my job is coming across some truly delightful vintage cookbooks. Long before glossy full page photographs of baked goods became the norm - cookbooks, if they included any images often featured some wonderful illustrations for the housewife to drool over. Many of the illustrated cookbooks tend to be 1910's to 1930's in origin - their colors are rich, wonderfully detailed and honesty, I think they sell the dishes pretty well. 

I could share many, many a cookbook I come across but there's one in particular that deserves a blog post. We came across this one in particular - one published in German in 1937, at an estate sale among a collection of several early 1900's German books. It's filled with wonderful color and black and white illustrations and the most amazing and detailed font throughout. 

When you consider the year - 1937 - this cookbook must  have some stories to tell. It was the fourth year with Hitler as Chancellor and it is often considered the year his foreign policies began to radicalise. May the 6th saw the now infamous Hindenburg disaster. I get intrigued about cookbooks, especially foreign ones, how and when did it get out of Germany, who was the lady that was cooking from it in 1937? How they she and her family fare the war? Did the war push them to moving to America or did they leave decades after? It would be impressive find if the cookbook had survived the war upon a kitchen shelf in Germany when you consider just how much damage the allied forces pounded upon German cities (over 19 of Germany's major cities were destroyed 50% or more).

If only the pages could talk ... 

Thursday, 6 February 2014

RECIPE: Banana Cake

BananaCakeRecipe

If you're easy seduced by cake - then this cake - a banana one has to go on your to bake list! While normally when we have left over, brown bananas I whip up a banana bread loaf - you can find the recipe I swear by here, Joe remembered seeing an interesting recipes for a banana cake in a recipe cook we picked up the day before at an estate sale (yeah I might have another issue with collecting vintage cookbooks). It did not disappoint.

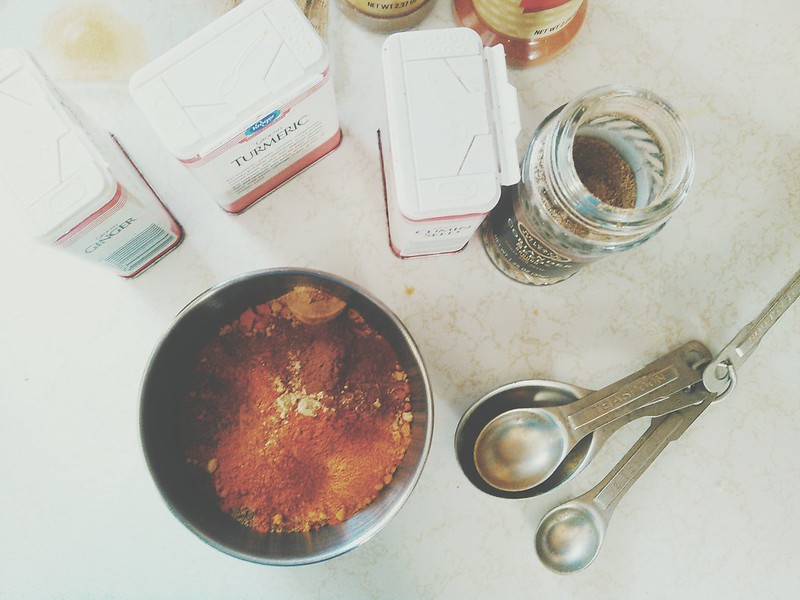
This version is one adpated, a lot adapted from the 1990 Hometown Collection a cookbook compiling recipes from around the US - this recipe in fact coming from the Catholic Diocese of Fargo, North Dakota. I didn't have all the ingredients the recipe suggested but i'm getting a little braver in adding and taking away items, so here goes;

Banana Cake

Cake;

3/4 cup of butter
1 1/2 cups of white sugar
2 eggs
1 cup of mashed bananas
2 cups of all purpose flour
1 teapsoon of baking powder
1 teaspoon of baking soda
1/2 teaspoon of salt
1/2 cup of milk
1 teaspoon of vanilla extract
1 cup of flaked coconut

In a large bowl cream the butter, gradually adding the sugar. Once mixed add in the eggs one at a time, finally adding the banana

Seperately combine the flour, baking powder, baking soda and salt. Alternating with the milk, add the dry mix into the creamed mixture, finally adding in the vanilla. 

Pour the batter into two 9" circular pans, topping off with 1/2 cup of coconut upon each one. Place into a preheated oven at 350F and bake for 30-35 minutes. 

Cool completely before making the filling and decorating with the frosting.

Creamy Filling;

1/2 cup of sugar
2 tablespoons of flour
1/4 teaspoon of salt
1/2 cup of milk
2 tablespoons of butter
1 teaspoon of vanilla extract

Combine the sugar, flour, salt, milke and butter into a saucepan and heat until the mixture has thickened. 

Remove from the heat, add in the vanilla and leave to cool completely. When cooled, turn one of the cake layers coconut side down, spread the filling and lower the second layer coconut side up. Decorate with the white snow frosting on all the sides and up to an inch around the top.

White Snow Frosting;

1/2 cup butter
1 egg white
1 teaspoon vanilla extract
2 cups of confectionery sugar

Combining the butter, egg white and vanilla extract mix until smooth. Gradually add in the powdered sugar. This actually made more then enough for icing, so make sure to help yourself to a big spoonful.

BananaCakeRecipe

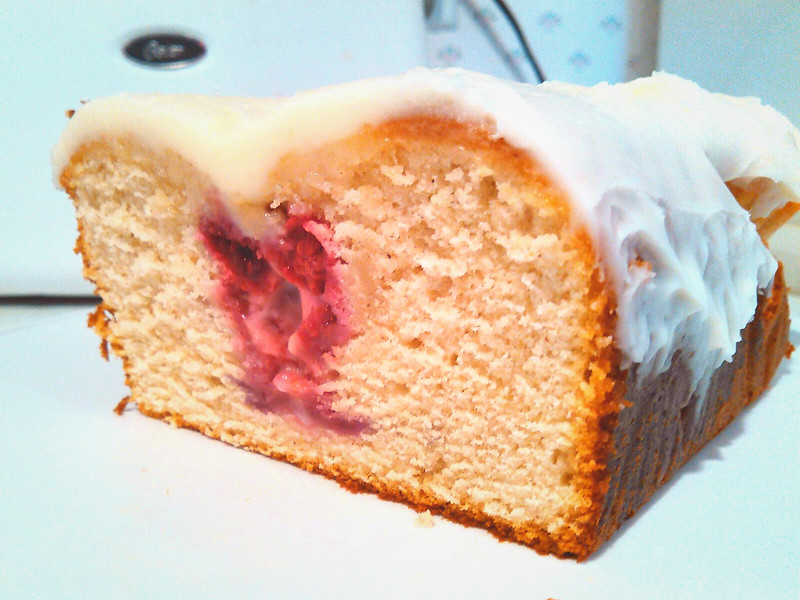
The end result is a really light, sweet cake, in fact I'd go as far as saying it's the lightest cake I've made to date and is certainly nothing like a dense banana bread. Granted you only want small slices - the icing is on the sickly side (you could even omit it completely).

After eying up some more of the recipes in this cookbook it's certainly becoming a firm favourite - any cookbook with a recipe for a rhubarb cake inside just has to be, right?!

How do you like your cake?

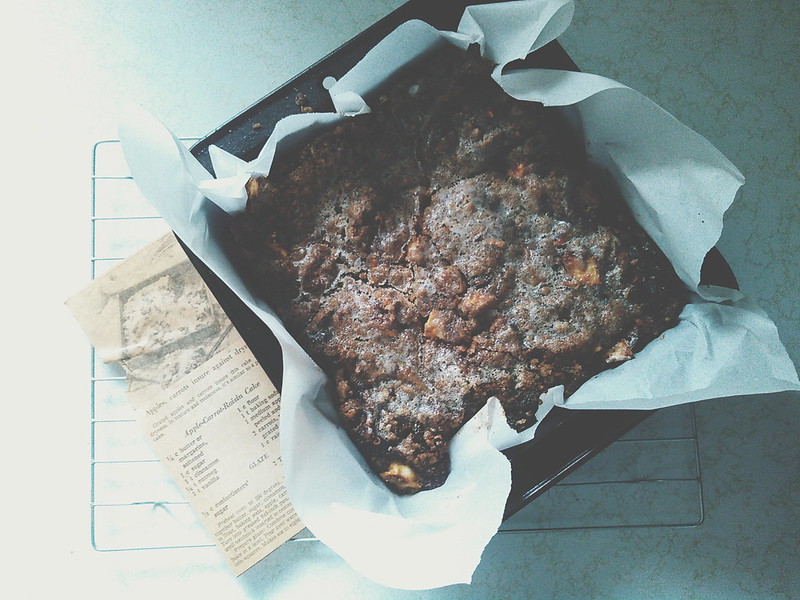
Please excuse the bad photographs - our apartment is a dark, dark place.

Thursday, 19 December 2013

FOOD: Homemade Cranberry Sauce

Cranberry Sauce
Cranberry Sauce

I've never been partial to cranberry sauce, but this recipe changes my opinion and I'll be more then happy to be eating this come Christmas Day. Joe has a huge love for cranberry sauce, so when they were on offer at Kroger (they are even Michigan grown) for $2 a bag a couple of weeks ago we grabbed some, mainly for the intention of making cranberry sauce for Joe to enjoy, now he has a rival for eating it!

Cranberry sauce is one of items that you imagine is harder to make then it actually is - or one of those things you wonder why bother making when it's already tinned. Pretty much all the recipes out there are extremely straight forward, more so then I would ever have believe prior to making a batch. Additionally it's a recipe that you can add and take away with ingredients as you please. 

For us we just wanted something straight forward but of course packed with taste. But finding a recipe that used one of my favorite things - bourbon, that recipe was a sure winner and it doesn't disappoint. The Bourbon Vanilla Cranberry Sauce takes about 30 mins or so to make and will provide you enough for two cups. Make sure to keep it sealed and stored in the fridge - it should last up to about two weeks under such conditions. The most amazing whiskey scent comes from the boiling, yet the sauce is not intoxicating, there's only a slight hint of something strong and lingering against the tartness of the cranberries. Being a big whiskey drinker myself, I might tinker and add a little extra bourbon in for good measure.

As I mentioned yesterday I might not be feeling the most festive when it comes to Christmas, but I'm certainly trying to go full out on the Christmas food this year with homemade stuffing, rolls and mince pies. 

What's your take on cranberry sauce - love or loath?!

Wednesday, 23 October 2013

FOOD: Homemade Apple Pie

Apples and Pie

There's something about the smell of stewing and baking apples that takes me right back to my childhood. As as the delicious smell of apple pies baking in the oven filled the apartment I was dreaming of proper English custard to top them off. Sadly that's a little harder to achieve in the USA but a girl can dream. 

When baking the basics I always reach for my vintage cookbooks whereby recipes are based around staple ingredients any decent baker should already have filling their cupboards. Simple ingredients in time tested recipes which are money saving and delicious. For both the pastry and apple pie recipes I owe to the Boston Cooking School Cook book - my prized edition published in 1936 - although it dates back to 1896 and is increasingly becoming a cooking book I swear by. While you have to play with the cooking times a little, everything is welcomingly straight forward, it calls for everyday items and most importantly, everything turns out tasty.

Apple Pie Recipe
Apple Pie

Pastry is one of those things in baking that takes practice and a little bit of natural talent. If you have naturally cold hands (I knew mine would eventually come in handy) you'll be a whizz at pastry making which was why my gran was a queen at being able to make pastry that was pliable, rollable and tasty. Pastry works best when it's made with cold hands, on a cold surface, with very cold water and after being cooled in the fridge for up to 18 - 24 hours which is why it's always best to make it the day before you need it (and then left out to get back to air temperature). You'll certainly notice a big difference if you don't let it cool prior to baking.

Pastry - enough for one 9" pie

1 1/2 cups of flour
1/2 teaspoon of salt
1/2 butter (or shortening)
Approx 1/4" of very cold, water

Pastry making itself is easy but it takes effort and a skill at knowing when it's just right. Start by mixing in your flour and salt together then cut in your butter and work it in with your fingers. No mixers or spoons - get down and dirty with your fingers. Mix and rub together until the butter is evenly mixed in and no larger then the size of a pea. Dribble the iced water in a little at a time until the dough is damp but not overly sticky. Roll with your hands into a ball and wrap into cling film (plastic wrap) and store in the fridge for a minimum of 18 hours. 

Baked Apple Pie

Personally I don't think you should mess around with the greats like apple pie - for me, simple is best although that doesn't necessarily mean it'll be plain or tasteless, certainly not. Granted you can play around with the spices (nutmeg and cinnamon work best) and throw in some raisins or raspberries if you have them on hand, but otherwise a slice of apple pie - hot or cold with custard, whipped cream or ice cream and i'm a happy girl.

Apple Pie

6 to 8 apples (eating or cooking)
1/2 to 3/4 of white or brown sugar
1/4 teaspoon of nutmeg or cinnamon
1/4 teaspoon of salt
1/2 tablespoons butter
2 teaspoons of lemon juice

After rolling out your pastry to line the bottom of a 9" pie tin, core and cut the apples into eighths. Line around the pie bottom working towards the center and then pile on the remainder. Here you could add in any extras you fancy - lemon rind, raspberries, raisins etc. Then mix together the sugar nutmeg (or cinnamon - or perhaps both if you fancy!) lemon juice and sprinkle all over the pile of apples. Finish off by dotting butter here and there. Wet the edges of the pie with water or milk and top with the upper pastry crust and press the edges tight together - perhaps even press together and decorate with a fork as I did.

After cutting a little vent or two into the top of the pie, bake at 450F for the first 10 minutes, reducing the heat to 350F for the next 45 or so minutes until the pie turns a lovely shade of gold - fitting for the autumnal season.

Don't you just love a slice of apple pie?!

PS - Make sure to check out my little guest post on Katie's blog Gold Dust as I talk about our kitty Smokey!

Wednesday, 18 September 2013

VINTAGE - Recipes Found Between the Covers

The wonderful thing with buying vintage cookbook is finding all the handwritten, newspaper and product leaflets filled with vintage recipes that have been stored, used as page markers and saved between the pages of these cookbooks. I always imagine the delicately written handwritten recipes notated on everything from war lumber recipes to invoices were those handed down from mother and daughter for generations or just quickly notated out in pencil while baking, piles of flour, sugar and butter all over the kitchen table as they remember a recipe of old. Many of the booklet tear outs date from the 1930's and earlier and I don't have the heart to throw them aside.

Perhaps I should sell them with the books they come from, while sometimes I keep them logged between the pages, more often I selfishly keep them for myself which brings the issue on how to preserve them. For now they are all just loose and stored in poly-wallets, but with many of them being double sided I wonder how to store them proper to admire them in the future (I'd love your ideas if you have them!).

Aren't you intrigued by the crazy cake and the cheddar apple bread recipes?!! I know I am! 

Monday, 1 April 2013

FOOD: Hot Cross Buns

Easter in the US is far more much about the religious meaning of the holiday over anything I've ever experienced in the UK. Food wise, Easter treats are more of the mini egg variety and marshmallow Peeps in comparison to chocolate eggs. Religious holidays aren't public holidays in the US so Good Friday and Easter Monday are same old working days. Last year Easter passed me by  - granted we can get our hands on cream eggs but they are smaller and, well I've now being craving hot cross buns for two years so something had to be done. And because I can't find them in stores it was time to get baking! 

To carry on the vintage recipe challenge I hunted and hunted in my vintage recipe books for something suitable, thing is there are so, so many variations on this recipe that it's hard to choose - even my mam was mailing me photocopies out of her vintage cookbooks and even a Mary Berry recipe. My choice was basically down to what I had in the cupboards and not having to go out of my way to buy anything special, my choice also took into consideration time - as with all yeast recipes it's all about the waiting - luckily this one is a "quick" recipe in comparison to many I found.

So this recipe comes from the 1949 New Recipes for Good Eating - a rather worn out and well used publication by Crisco and Procter and Gamble. The recipe for the icing comes from another booklet - a much older cookbook from 1917 and published by Fleischmann (a yeast brand) Excellent Recipes for Baking Raised Breads. Both cookbooks are far too damaged to sell, so I've rehomed them.

Hot Cross Buns - this recipe makes 18 to 20, 2½" buns and takes about 4 hours.

● 1 cake yeast (which is 2 ¼ tsps of dry yeast)
● 1/3 cup of white sugar
● 2/3 cup of warm milk
● 3½ cups of sifted flour
● ½ of melted butter (the recipe calls for Crisco but that's just lard)
● 3 eggs
● ¾ teaspoon of salt
● 1 teaspoon of cinnamon 
● 2/3 cup of raisins

In a bowl dissolve the yeast and sugar with the warm milk. Add one cup of the flour and beat until smooth. Then add in the butter, eggs, the remaining flour, salt and cinnamon. When mixed, stir in the raisins. Leave in a warm place for up to two hours - you could leave it for just an hour, but the longer the better. With all breads I make I always place over the bowl a tea towel which I dampened with warm water draped over the bowl for added heat for the yeast to get moving.

Once your mixture has risen to about double it's size, punch down (literally punch the mixture) and roll out onto a floured surface, you want to roll it down so it's around an inch in thickness, then cut until your bun shape.

Place on a prepared lined tin around 2" apart and again leave them for around an hour and a half until they double in size. Once they have risen, snip a small cross in the top and place into a preheated oven at 350F for 15 to 20 minutes. Out of the oven you're ready to add the frosting which can be added when they are still warm.

Plain Frosting

● 1 cup of powdered sugar
●  2 tablespoons of milk or water
● ¼ teaspoon of vanilla 

To keep up with tradition the frosting is normally added in a cross design.


It was certainly worth having a bake of these hot cross buns and they satisfied my cravings for Easter sugar. These buns have a bit more of a cinnamon pastry flavor (obviously due to the amount of cinnamon inside), they are great to be eaten alone or with butter and or jam if you're feeling the need for a treat and I'm more then a bit proud that they actually turned out pretty well. As for Easter itself we popped to a couple of estate sales, had a meal at our favourite seafood restaurant for our date night and curled up on the sofa reading what will sadly be the last book Ash by James Herbert who sadly passed the other week - his books got me reading horror.

What are your favorite treats for Easter? Have you ever tried to bake hot cross buns?

Tuesday, 26 March 2013

Vintage Recipe #1 Peanutty Cocoa Bread


One of the great things about fostering vintage recipe and cooking books until I find them new loving homes, is I get to pour over their delicious ideas, copy them out and use them myself. It's like giving the books a mini test run. If I had the money and the ability of never ever putting on weight I'd bake daily and since moving it's something I've come to enjoy more as I learn more about baking to the point of even wanting to try and bake hot cross buns for Easter - but that's for another week. So my mission is to share some of these gorgeously delicious vintage recipes with you. It might not necessarily be a weekly post, just as and when I get around to baking. 

The vintage recipe numero 1 is (not overly vintage recipe) one which comes from the 1982 Hershey's Chocolate and Cocoa Cookbook which makes use of tasty tasty Reesey peanut butter chips. Please excuse the lack of photographs gracing this post - the idea of the vintage recipe posts occurred minutes after taking said loaf out of the oven - the recipe book actually found a new home this weekend so i'm glad I tried and tested this recipe before hand.

But here goes the recipe for the first;

Peanutty Cocoa Bread - makes one loaf

● 1/3 cup of softened butter (or margarine)
● 1 cup of granulated sugar
● 3 eggs
● 2¼ cup of unsifted all-purpose flour
● 1/3 of cocoa powder
● 2 teaspoons of baking powder
● 1 teaspoon of cinamon
● ½ teaspoon of baking soda
● ¾ of a cup of milk
● 1 cup of (Reese's peanut butter chips)

Start with creaming your butter (or marg) with the sugar and eggs in a large bowl. In another bowl, combine the flour, cocoa, baking powder and soda and cinamon. Once mixed alternate adding the dry indegreidents with the milk into the creamed mixture.

Once well blended, stir in the peanut chips and pour the batter into a lined loaf tin. Bake in a preheated oven at 350°F for 60-65 minutes.


Until I moved to the US I was never aquainted with Reese cups, but oh my are they one of my favourite things about US food and sticking their mini cups in a loaf is just right on so many levels. If you're like me, serve it with butter (nom) - my grandmother got me into that habit.

If you'd love to see any particularly recipe but from a vintage cookbook let me know and I'll see if I have one!

Monday, 24 December 2012

FOOD: Mince Pie Cookies

To me Christmas isn't right without mince meat - granted it's a love-hate thing for many people but to me it's beyond tasty. Here in the USA mince meat isn't the easiest of things to find and when it is found it's not on the cheap side but when I found (what you'd probably only find in the US) a cheap "condensed" package of mincemeat it was coming home with me. What's even better is that it had a recipe for mince pie a cakey kind of cookie on the side - a perfect mix of the British (mincemeat) and the American (cookies) and even more perfect for a blog post on Christmas eve.

Goodies required; 
1 cup of butter
1 1/2 cups of white sugar
3 eggs
1 tsp. of baking soda
1-2 tablespoons of milk (if required)
1 package of condensed mincemeat

Beating together the butter and the sugar until lovely and fluffy, add in the three eggs one at a time. In a separate bowl mix the dry ingredients and then spoon into the wet mix. If the mix is looking too dry you might want to add milk but only one tablespoon at a time. Last crumble up the mincemeat and add in, mixing just a little. Shape into cookies and bake for 10 minutes at 375F.

On that note Merry Christmas to everyone - we're being low key and low budget while pleasing ourselves going to an all you can eat Chinese buffet - yum! 

Monday, 19 November 2012

The Year I Bake My First Christmas Cake

I may be kidding myself in thinking I can bake a Christmas Cake but it's something that has always been a part of Christmas in my life. Apart from last year and in all honesty, I missed having one. So this year I'm determined to bake my own or at least attempt too.

Christmas Cake [or as they are just often called in the US Fruit Cakes] can be a little of a deal breaker - you either love them or hate them, but I've always been a little partial to a slice with some butter on, and if I'm splashing out a slice of nice cheese too. But they aren't the easiest things to bake and require a little extra thought and time. Also they aren't really to be baked three days before Christmas, traditionally the longer it rests before the festive season the better - some say around Halloween, some earlier. As long as you have an air tight box your set. Or you could just run down to Marks and Spencers and grab one of there's - they make tasty tasty ones. 

So I wanted to try with an easy recipe, but then I got carried away and started changing it all to fit my wants  and it's certainly not dark like the traditional fruit cake. It's basically a cherry recipe with raisins and sultanas and instead of using all the suggested orange juice  I replaced some of it with some good old rum for a festive kick [and because we didn't have brandy and I thought why the hell not].

Shopping list;
1 cup of white sugar
1 cup of butter
2 medium eggs
1/4 cup of orange juice - from a bottle or actual oranges
1/4 cup of rum
2 cups of all purpose flour
1 teaspoon of baking powder
12 ounces of mixed fruit - whatever you have
8 ounces of halved glazed cherries

If you want that extra kick it's best to start preparing your fruit the day before. Cut, slice throw in all your dried fruit - the raisins, cherries, sultanas and pour over the rum - ours being a nice rich spiced dark rum. Then you just need to cover and leave it to sit for a good 24 hours for all that tasty rum to be soaked into the fruit. Mmmm.


In one bowl you want to cream your butter and sugar together until light and fluffy. Add in your orange juice and eggs mixing well. Sift the flour and baking powder together in a separate bowl. Take 1/3 of this flour mix and add it into the raisins and cherries - apparently adding some of the flour straight to the fruit stops them from sinking when it comes to baking it. Apparently.


Add the flour mix to the batter and blend, finally adding in your flour fruit mixture and mix just till it's all lovely and combined.


Pour into a lined bread loaf tin and stick in your preheated oven (300F/150C) for 2 hours - don't open the oven until at least 2 hours have past.

This is the first recipe I've ever written on LOTS without testing first so what it actually tastes like is a mystery but my does it smell good! It's best to keep cakes such as these wrapped up nice and tight in either tin foil or baking paper in a air tight tin and they last really well. A week or two before Christmas you can dribble some more rum over the top and let it soak in to add even more of a kick! I'm debating about covering it in marzipan and icing - i'm not sure how feasible that is for a somewhat okayish baker.
Are you a fan of Christmas cakes whether they be from Marks and Spencers or homemade?! Do you bake anything special for the festive season? 

Friday, 7 September 2012

Something For The Weekend - Wine Cupcakes

I love a cupcake as much as anyone - but sometimes you just need to experiment and perhaps make them a little more adult oriented. With wine. These wine cupcakes were baked for a friends birthday and have one cup of wine between the icing and the cake mixture. While you'd need a lot of them to get tipsy you can certainly taste the wine kind of in a chocolate liquor way, but nicer. Much nicer. I owe the recipe to Betty Crocker who also has a recipe I must try for Margarita cupcakes - she lives on the wild side that Betty.

Zinfandel Wine cupcakes - makes around 24

Ingredients 

For the cupcakes;
  • 1 box of devils food mix
  • 3/4 of a cup of water
  • 1/2 a cup of Zinfandel wine
  • 1/3 of a cup of vegetable oil
  • 3 eggs
  • 1 cup of chocolate chips

And the icing;
  • 6 cups of shifted icing [confectioners] sugar
  • 1/3 of a cup of softened butter
  • 1/3 of a cup of baking cocoa
  • 1/2 a cup of Zinfandel wine

Taking the mix of the devils food, beat together with the water, wine, oil and eggs for a good 30 seconds, increasing to a high speed for a further two minutes. Beat in the chocolate chips before dividing into the bun cases.

Place in a preheated 350F oven, bake for 20/22 minutes. Cooling completely before icing.


Mix the powdered sugar, cocoa, butter with a mixture until well blended. Pour the wine in slowly, if the frosting remains too thick add more wine a little at a time. Frost your cupcakes as desired.  


They taste as good as they look. If I say so myself. I hope you're all tempted!

Friday, 10 August 2012

FOOD: Carrot Cake Cupcakes


Failure in making a carrot cake once before slightly put me off ever trying to bake using carrot again until I started craving it and then the stomach just commends me to try. This was another recipe I adapted from a cake based recipe into cupcakes and changed some of the ingredients around. If I do say so myself it made some super tasty little cupcakes that are lovely and moist and certainly rich in flavour. You could use the normal cream cheese frosting you traditionally get with  carrot cakes but I didn't have any and it tastes just as good without.

INGREDIENTS - makes 16/18 nice sized cupcakes
  • 1 1/4 cups of brown sugar
  • 3/4 cup of vegetable oil
  • 3 eggs
  • 1 1/2 cups of all purpose [or plain] flour
  • 1 1/2 teaspoons of baking powder
  • 1 teaspoons of baking soda
  • 1 teaspoon of ground cinnamon
  • 1/2 teaspoon of ground ginger
  • 2 1/2 cups of grated carrots - around 5/6 medium sized carrots
  • 1/2 cup of raisins

Place the sugar and vegetable oil into a bowl mix together for 2 to 3 mines. Add in the eggs one by one followed by the flour, baking powder and baking soda alongside the cinnamon and ginger mixing well. Stir in the grated carrots and add in the raisins. Spoon into the cupcake cases and place in a preheated oven at 180C/350F, baking for 20 minutes until golden and cooked through.

Do you partake in the odd bit of carrot cake? 

Friday, 3 August 2012

FOOD: Chicken Curry

If you follow me on Twitter you will know that Wednesdays in our apartment is always curry night. While I've always been a fan of curries they use to come out of a jar, until Joe encouraged me to start experimenting in making my own. Now curries are one of my favourite things to cook, from tandoori, onion gravy curries to garam masala curries I've made pastes, naan pizza curries - everything. 

Making your own curries the first couple of times can be rather intimidating but they are some great simple recipes out there to get you on your way. While there's the expense of having to purchase lots of different spices, in the long run you'll find it cheaper and you'll enjoy the freedom of being able to mix and match, change it for your tastes or for how spicy you like it, and know it's all fresh when you get down to the all important eating.

So I thought I'd share with you an easy basic chicken curry recipe which is mild to medium in hotness if you're looking for somewhere to start. This recipe itself is one I've changed to fit our tastes and what we have in the fridge and that itself is one of the beauty's of making curries - you can add or take out anything you don't like or don't have.

INGREDIENTS to make a 2/3 person serving
  • Vegetable oil
  • 1 medium onion
  • 1 large chicken breast
  • 3 cloves of garlic
  • 1 green chili
  • 1/4 tsp salt
  • 1/4 tsp turmeric
  • 1/2 tsp ground cumin
  • 1/3 tsp ground coriander
  • 1 tin of diced tomatoes
  • 1/4 - 1/2 cup of plain yoghurt
  • 1/4 tsp of garam masala

Start by finely chopping your onion and fry with vegetable oil on a mid to high heat, I like my onions to start going nice and brown which takes 5/8 minutes. When your onions are golden add in your chicken breast which should be cut into bite sized pieces.


Frying the chicken for around 5 minutes add in your chopped chilli [making sure you removed the seeds] and crushed garlic, quickly frying them for a minute or two. Then the fun bit - add in all the lovely spices - the salt, turmeric, coriander and cumin, making sure everything is mixed well. 


Pour in your tinned tomatoes and reduce the heat to low, cover the pan and leave to simmer around 15 minutes. You can add water a tablespoons at a time if your curry is starting to loose all it's gravy and juices.


By now your curry should be simmering nicely so add in the plain yoghurt. Once mixed, turn off the heat, add your garam masala. Serve on rice with or without naan bread.


Tasty indeed!

Have you ever made your own curry?

Friday, 27 July 2012

Raspberry & Buttercream Butterfly Buns

I had to show you one of my favourite things I use while baking - my plastic spatula headed by a little piggy. We picked it up from Home Goods - it just makes me smile every time I use it. I also like pretty coloured bun cases but I have a thing were the same colour can't be on the same line of the baking tray. I'm odd like that.

I must apologise for the varying outcome of my food photographs - our kitchen has no window and the lighting is beyond poor for photography so I have to try and rescue images as much as I can through editing.

Anyways Fridays seem to be the day were I share with you something tasty I've been baking during the week. This is actually the second batch of these buns I've made after they went out a huge hit with the boy but I ended up eating most of them because they are just oh so tasty. I grew up with butterfly buns because they are really quick to make, however they never had jam in, that was my addition and they are certainly worth a try.

For the cupcake mixture I used a basic WHITE CAKE RECIPE which should make 12/15 cupcakes
  • 1 cup of white sugar
  • 1/2 cup butter
  • 2 eggs
  • 2 teaspoons vanilla extract
  • 1 1/2 cups of all purpose flour
  • 2 teaspoons of baking powder
  • 1/2 cup of milk

In a bowl cream together the sugar and butter until nice and creamy, add in both the eggs and the vanilla extract and continue to stir. Separately combine the flour and the baking powder adding slowly to the creamed sugar butter mixture. Finally mix in the milk and mix well. Pour your batter into your cupcake cases and bake in a preheated 350F oven for 20-25 minutes.

FILLING AND BUTTERCREAM
  • Jam of your choice
  • 1 cup of confectioners [powdered] sugar
  • 3 tablespoons of butter

Combining the sugar and the butter [you may need to add extra butter to get a nice creamy mixture] and mix thorough. Cutting a well out into each of the cupcakes cutting the cut out cupcake piece in half, add some jam [as much or as little as you like]  top off with the buttercream and replace the two cut out pieces upon the top as decoration. Looking at the images above will probably make more sense then trying to explain it.

PS still time to sign up for blog ad sponsorship for August, just leave your details and I'll be in touch!